Hello readers!! Welcome to the first of four posts covering the entire RC plane experience, including basics, electronics, scratch building and flying/optimizing. In this post, I will cover the basics of RC planes, and in the next 3 posts, I will walk you through my own building journey, from the start to finish, telling you about the mistakes I made and how to not repeat them. I will try to cover everything you need to know in order to get stared on your own journey through RC planes!!
What exactly are RC planes?
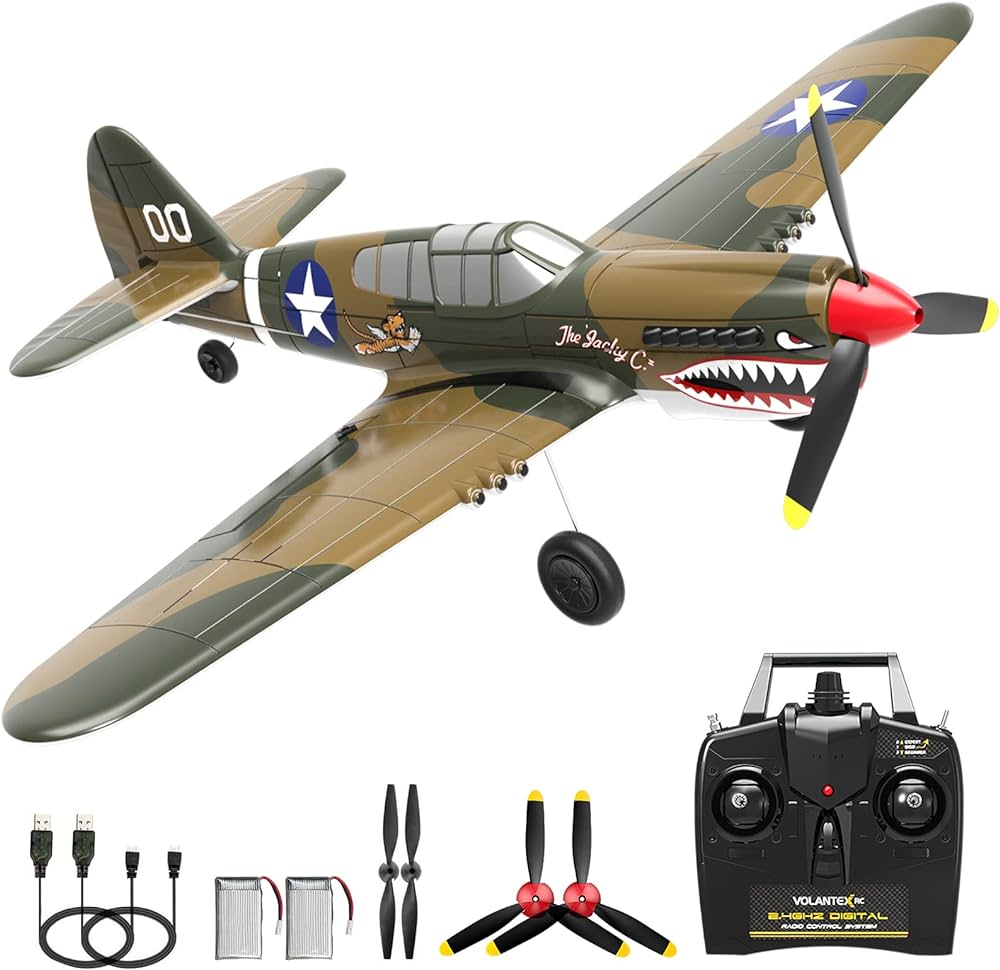
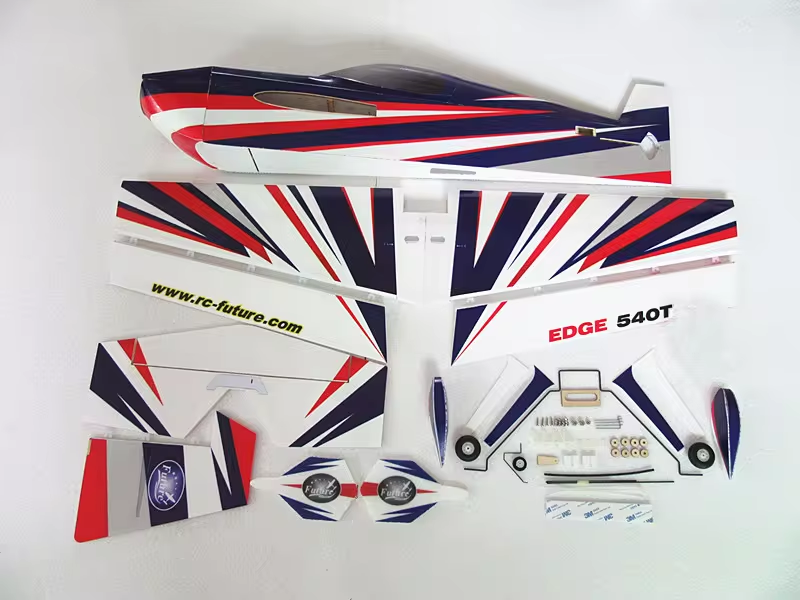
Well to me, they’re pieces of foam, wood or metal that closely resemble planes, and can be flowing using remote controls. There are 3 basic types- Ready to fly, Plug and play, and scratch builds. Ready to fly models, like the names suggest, are ready to fly from the box. There are most often on websites like amazon, and are planes you should get if you solely want to enjoy flying, not dealing with the building process. Plug and play planes have a basic skeleton structure, stipped out of electrioncs, and need a person to correctly secure all the components to complete it. It does not require any building, just the correct knowledge of electronics which is often mentioned in the manual. Even if it’s not, don’t worry, I’ll have you covered in the next post :).

Which one is right for me?
This is quite a easy question to answer, and there are 3 main categories you can put yourself in-
I want to fly planes, don’t really want to put in effort to build it- Ready to fly
I want to understand how exactly they work, don’t want to give the project a lot of time though- Plug and play
I love the building process, its part of why i like RC planes. I have enough time to make my own plane, too- Scratch build
However, if budget is a restraint, I wouldn’t recommend going for scratch building or plug and play models, which is kind of counter-intuitive. Even though you may think it’s going to be cheaper to build it yourself, the sad truth is that the right electronics and materials are expensive, and cannot compete with huge discounts manufactures of ready to fly planes get. So, if budget is very tight, I’d just get a rc plane from amazon, they have decent planes going for around 2000 INR ($25).
Essential Components & Terminology
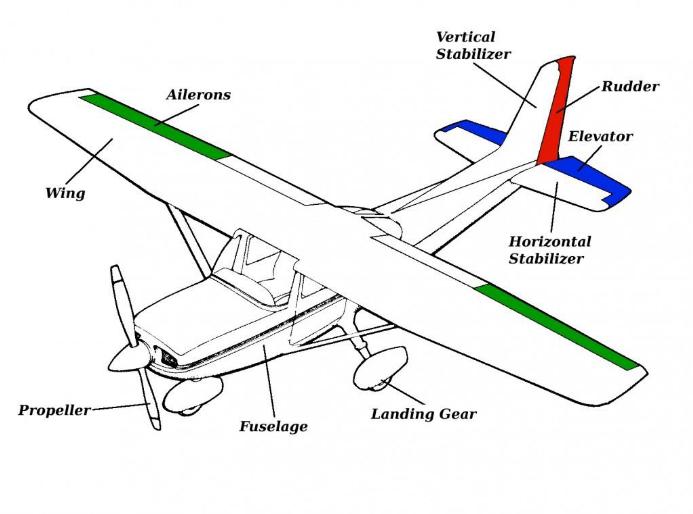
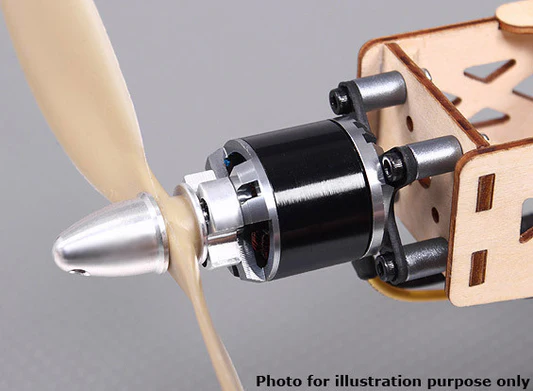
When it comes to building an RC plane, understanding the essential components is key to getting it off the ground. At the core of every plane is the fuselage, which gives the plane its structure and houses all the electronics, like the receiver and battery (In an actual plane, the fuselage contains all the passengers and cargo). Then, of course, you’ve got the motor and propeller, which together provide the thrust needed to get the plane moving forward. Now, there are further technicalities when choosing which propellor and motor to use, and we will go over them in the electronics blog post, so don’t forget to check that out. Then, we have the wings, which are probably the most critical part of the whole setup. The wings are responsible for generating lift that keeps the plane in the air. Equally important is the tail section, which includes the vertical stabilizer and horizontal stabilizer, which help keep the plane stable during flight and prevent it from tumbling out of control.
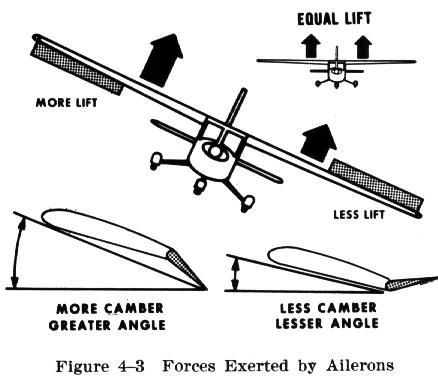
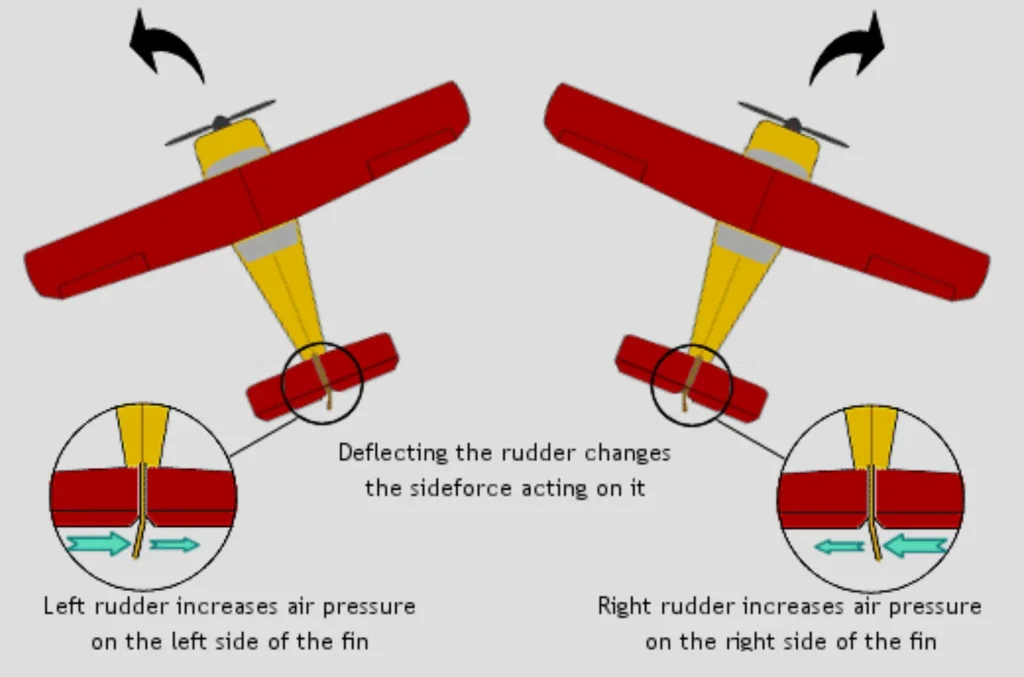
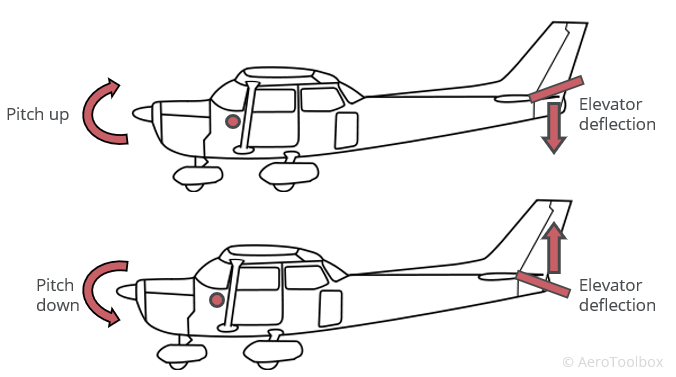
Now, to actually control the plane, there are mainly 3 control surfaces you can use to manupliate the airflow around the plane, which allows the plane to steer. There are the ailerons, elevator, and rudder.
-Ailerons are small hinged sections on the back edge of each wing. They control the plane’s roll, which allows it to bank left or right. When one aileron moves up, the other moves down, causing the plane to tilt in the desired direction.
-The elevator is located on the horizontal stabilizer at the tail of the plane. It controls the pitch of the plane, allowing it to climb (nose up) or descend (nose down). Raising the elevator causes the nose to lift, while lowering it causes the nose to drop.
-The rudder is attached to the vertical stabilizer (also at the tail) and controls the plane’s yaw, which is the left or right movement of the nose. It works like a steering wheel, letting the plane pivot on a vertical axis.
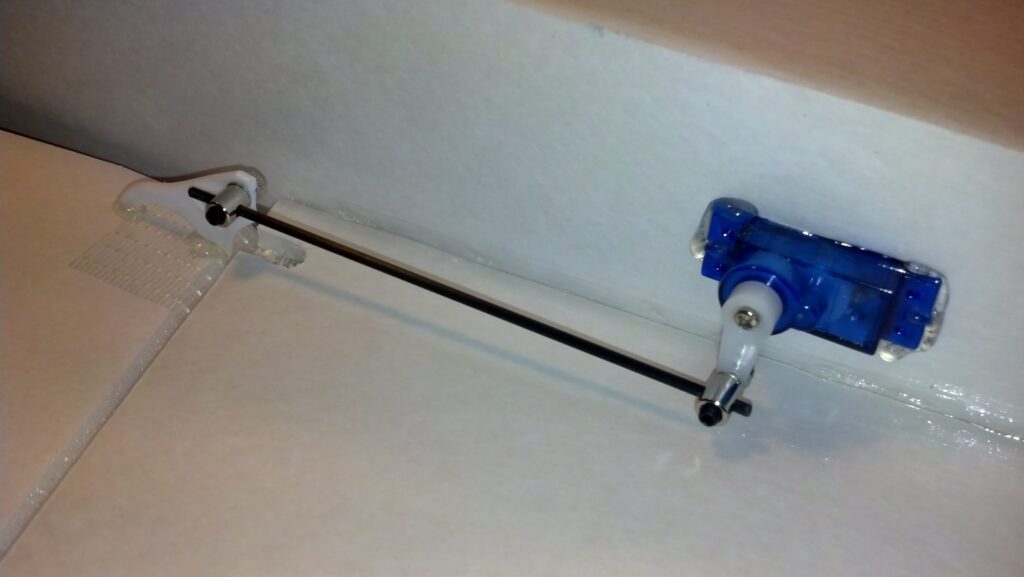
In a RC plane, these surfaces are manipulated using servomotors. Servo motors, along with thin metal rods (called control rods) and control horns, work together to push or pull the movable surfaces of the plane. In a ideal setup, as the servo motor twists in 1 direction, the control rod attached to it is pulled along. This causes the control horn (which is attached to the opposite end of the control rod) to be pulled as well. This control horn is attached to surfaces like the ailerons, evelators, and rudders, which move as the control horn moves.
Also, don’t forget the battery, which powers the motor and all the electronics on board, and the ESC (Electronic Speed Controller) that manages the motor’s power (by regulating the current). Finally, the ways you’ll actually control the contorl surfaces is through the transmitter and receiver. They consist of a remote and a receiver node that can communicate wirelessly, allowing you to give inputs to the plane.
Will it fly?
Oh, it’ll fly, assuming everything’s set up right. If you’ve got all the essentials in place like the fuselage, motor, wings, and the control surfaces (ailerons, elevator, rudder), and your center of gravity’s dialed in, you’re good to go. The manufacturers often mark a spot at which the plane should balance, with equal weight on either side of that point (usually, its about the wings). Also make sure your transmitter and receiver are synced up, the battery’s charged, and you’ve double-checked that the control surfaces are responding like they should. Another thing to keep in mind while flying is distance of signal, so ask a friend to go as fas as they can with the plane and see at what distance the plane stops responding to your inputs. Keep in mind this distance when flying.
I hope this blog helped you out. Don’t forget to read my next 3 posts covering how I built my RC plane! I will see you all in the next one.
